Category Archives: Computers

Google’s chrome OS to launch soon

Google’s Chrome OS project, first announced in July, will become available for download within a week, we’ve heard from a reliable source. Google previously said to expect an early version of the OS in the fall.

What can we expect? Driver support will likely be a weak point. We’ve heard at various times that Google has a legion of engineers working on the not so glamorous task of building hardware drivers. And we’ve also heard conflicting rumors that Google is mostly relying on hardware manufacturers to create those drivers. Whatever the truth, and it’s likely in between, having a robust set of functioning drivers is extremely important to Chrome OS’s success. People will want to download this to whatever computer they use and have it just work.

We expect Google will be careful with messaging around the launch, and endorse a small set of devices for installation. EEE PC netbooks, for example, may be one set of devices that Google will say are ready to use Chrome OS. There will likely be others as well, but don’t expect to be able to install it on whatever laptop or desktop machine you have from day one. Google has previously said they are working with Acer, Adobe, ASUS, Freescale, Hewlett-Packard, Lenovo, Qualcomm, Texas Instruments, and Toshiba on the project.

We’ve seen convincing and not so convincing screenshots of Chrome OS over the last several months. The good news is the speculation is about to end, and you can try it out yourself. If you have one of the supported devices, that is.

via Techcrunch

Windows 7 tricks and secrets

Lately I installed windows 7 on my xps 1210 and its awesome. I had been discovering small tricks in win 7 and then I stumbled upon to this mega tricks list of the OS on msdn blogs.

Enjoy.

  1. Windows Management. By now, you’ve probably seen that Windows 7 does a lot to make window management easier: you can “dock” a window to the left or right half of the screen by simply dragging it to the edge; similarly, you can drag the window to the top of the screen to maximize it, and double-click the window top / bottom border to maximize it vertically with the same horizontal width. What you might not know is that all these actions are also available with keyboard shortcuts:
    • Win+Left Arrow and Win+Right Arrow dock;
    • Win+Up Arrow and Win+Down Arrow maximizes and restores / minimizes;
    • Win+Shift+Up Arrow and Win+Shift+Down Arrow maximizes and restores the vertical size.

    This side-by-side docking feature is particularly invaluable on widescreen monitors – it makes the old Windows way of shift-clicking on two items in the taskbar and then using the context menu to arrange them feel really painful.

  2. Display Projection. Had enough of messing around with weird and wonderful OEM display driver utilities to get your notebook display onto an external projector? In that case, you’ll be pleased to know that projection is really quick and simple with Windows 7. Just hit Win+P, and you’ll be rewarded by the following pop-up window:
    The Win+P Projector Settings window allows you to quickly switch display settings.
    Use the arrow keys (or keep hitting Win+P) to switch to “clone”, “extend” or “external only” display settings. You can also access the application as displayswitch.exe.

    If you want broader control over presentation settings, you can also press Win+X to open the Windows Mobility Center, which allows you to turn on a presentation “mode” that switches IM clients to do not disturb, disables screensavers, sets a neutral wallpaper etc. (Note that this feature is also available in Windows Vista.)

  3. Cut Out The Clutter. Working on a document in a window and want to get rid of all the extraneous background noise? Simply hit Win+Home to minimize all the non-active background windows, keeping the window you’re using in its current position. When you’re ready, simply press Win+Home again to restore the background windows to their original locations.
  4. Multi-Monitor Windows Management. The earlier tip on window management showed how you can dock windows within a monitor. One refinement of those shortcuts is that you can use Win+Shift+Left Arrow and Win+Shift+Right Arrow to move windows from one monitor to another – keeping them in the same relative location to the monitor’s top-left origin.
  5. Command Junkies Only. One of the most popular power toys in Windows XP was “Open Command Prompt Here”, which enabled you to use the graphical shell to browse around the file system and then use the context menu to open a command prompt at the current working directory. In Windows 7 (and in Windows Vista, incidentally – although not many folk knew about it), you can simply hold the Shift key down while selecting the context menu to get exactly the same effect. If the current working directory is a network location, it will automatically map a drive letter for you.
  6. It’s a Global Village. If you’ve tried to change your desktop wallpaper, you’ve probably noticed that there’s a set of wallpapers there that match the locale you selected when you installed Windows. (If you picked US, you’ll see beautiful views of Crater Lake in Oregon, the Arches National Park, a beach in Hawai’i, etc.) In fact, there are several sets of themed wallpapers installed based on the language you choose, but the others are in a hidden directory. If you’re feeling in an international mood, simply browse to C:\Windows\Globalization\MCT and you’ll see a series of pictures under the Wallpaper directory for each country. Just double-click on the theme file in the Theme directory to display a rotation through all the pictures for that country. (Note that some countries contain a generic set of placeholder art for now.)
  7. The Black Box Recorder. Every developer wishes there was a way that an end-users could quickly and simply record a repro for the problem that they’re running into that is unique to their machine. Windows 7 comes to the rescue! Part of the in-built diagnostic tools that we use internally to send feedback on the product, the Problem Steps Recorder provides a simple screen capture tool that enables you to record a series of actions. Once you hit “record”, it tracks your mouse and keyboard and captures screenshots with any comments you choose to associate alongside them. Once you stop recording, it saves the whole thing to a ZIP file, containing an HTML-based “slide show” of the steps. It’s a really neat little tool and I can’t wait for it to become ubiquitous on every desktop! The program is called psr.exe; you can also search for it from Control Panel under “Record steps to reproduce a problem”.
    The Problem Steps Recorder provides an easy way for users to record a problem repro for later diagnosis.
  8. The Font of All Knowledge. Long Zheng will be happy: we’ve got rid of the Add Fonts dialog that has served Windows faithfully for the last twenty years. (Of course, for most of that time, it’s been deprecated – the easy way to install a set of fonts has simply been to drag them into the Fonts folder via Control Panel.) But now font installation is really easy – we’ve added an “Install” button to the font viewer applet that takes care of the installation process:
    You can install a font in Windows 7 from the standard font viewer dialog.
    There are lots of other new features built into Windows 7 that will satisfy those of a typographic bent, incidentally – grouping multiple weights together, the ability to hide fonts based on regional settings, a new text rendering engine built into the DirectWrite API, and support in the Font common file dialog for more than the four “standard” weights. For example:
    The new common font dialog in Windows 7 supports more than four weights for a font.
  9. Gabriola. As well as the other typographic features mentioned above, Windows 7 includes Gabriola, an elaborate display type from the Tiro Typeworks foundry that takes advantage of OpenType Layout to provide a variety of stylistic sets, flourishes and ornamentation ligatures:
    Some sample variants of the Gabriola display font.
  10. Who Stole My Browser? If you feel like Internet Explorer is taking a long time to load your page, it’s worth taking a look at the add-ons you have installed. One of the more helpful little additions in Internet Explorer 8 is instrumentation for add-on initialization, allowing you to quickly see whether you’re sitting around waiting for plug-ins to load. Just click Tools / Manage Add-ons, and then scroll right in the list view to see the load time. On my machine, I noticed that the Research add-on that Office 2007 installs was a particular culprit, and since I never use it, it was simple to disable it from the same dialog box.
  11. Rearranging the Furniture. Unless you’ve seen it demonstrated, you may not know that the icons in the new taskbar aren’t fixed in-place. You can reorder them to suit your needs, whether they’re pinned shortcuts or running applications. What’s particularly nice is that once they’re reordered, you can start a new instance of any of the first five icons by pressing Win+1, Win+2, Win+3 etc. I love that I can quickly fire up a Notepad2 instance on my machine with a simple Win+5 keystroke, for instance.What’s less well-known is that you can similarly drag the system tray icons around to rearrange their order, or move them in and out of the hidden icon list. It’s an easy way to customize your system to show the things you want, where you want them.
  12. Installing from a USB Memory Stick. My wife has a Samsung NC10 netbook (very nice machine, by the way), and we wanted to install Windows 7 Beta on this machine to replace the pre-installed Windows XP environment. Like most netbook-class devices, this machine has no built-in media drive, and nor did I have an external USB DVD drive available to boot off. The solution: I took a spare 4GB USB 2.0 thumbdrive, reformatted it as FAT32, and simply copied the contents of the Windows 7 Beta ISO image to the memory stick using xcopy e:\ f:\ /e /f (where e: was the DVD drive and f: was the removable drive location). Not only was it easy to boot and install from the thumbdrive, it was also blindingly fast: quicker than the corresponding DVD install on my desktop machine.It’s also worth noting in passing that Windows 7 is far better suited to a netbook than any previous operating system: it has a much lighter hard drive and memory footprint than Windows Vista, while also being able to optimize for solid state drives (for example, it switches off disk defragmentation since random read access is as fast as sequential read access, and it handles file deletions differently to minimize wear on the solid state drive).
  13. I Want My Quick Launch Toolbar Back! You might have noticed that the old faithful Quick Launch toolbar is not only disabled by default in Windows 7, it’s actually missing from the list of toolbars. As is probably obvious, the concept of having a set of pinned shortcut icons is now integrated directly into the new taskbar. Based on early user interface testing, we think that the vast majority of users out there (i.e. not the kind of folk who read this blog, with the exception of my mother) will be quite happy with the new model, but if you’re after the retro behavior, you’ll be pleased to know that the old shortcuts are all still there. To re-enable it, do the following:
    • Right-click the taskbar, choose Toolbars / New Toolbar
    • In the folder selection dialog, enter the following string and hit OK:
      %userprofile%\AppData\Roaming\Microsoft\Internet Explorer\Quick Launch
    • Turn off the “lock the taskbar” setting, and right-click on the divider. Make sure that “Show text” and “Show title” are disabled and the view is set to “small icons”.
    • Use the dividers to rearrange the toolbar ordering to choice, and then lock the taskbar again.

    If it’s not obvious by the semi-tortuous steps above, it’s worth noting that this isn’t something we’re exactly desperate for folks to re-enable, but it’s there if you really need it for some reason. Incidentally, we’d love you to really try the new model first and give us feedback on why you felt the new taskbar didn’t suit your needs.

  14. It’s a Drag. Much play has been made of the Jump Lists feature in Windows 7, allowing applications like Windows Live Messenger to offer an easy task-based entry point. Jump lists replace the default right-click context menu in the new taskbar; another way to access them (particularly useful if you’re running Windows 7 on a one-button MacBook) is by left-clicking and dragging up in a kind of “swooshing” motion. This was designed for touch-enabled devices like the beautiful HP TouchSmart all-in-one PC, where the same gesture applies.Another place where you can “swoosh” (not an official Microsoft term) is the IE 8 address bar, where the downward drag gesture brings up an expanded list containing the browser history, favorites and similar entries. The slower you drag, the cooler the animation!
  15. Standards Support. Every review of Windows 7 that I’ve seen has noted the revamped WordPad and Paint applets that add an Office-like ribbon to expose their functionality. Few, however, have noticed one small but hopefully appreciated feature: WordPad can now read and write both the Word 2007-compatible Office Open XML file format but also the OpenDocument specification that IBM and Sun have been advocating:
    WordPad in Windows 7 allows you to save in ODF or OOXML formats.
  16. Windows Vista-Style Taskbar. I wasn’t initially a fan of the Windows 7 taskbar when it was first introduced in early Windows 7 builds, but as the design was refined in the run up to the beta, I was converted and now actively prefer the new look, particularly when I’ve got lots of windows open simultaneously. For those who really would prefer a look more reminiscent of Windows Vista, the good news is that it’s easy to customize the look of the taskbar to more closely mirror the old version:
    The Windows 7 Taskbar can be configured for a Windows Vista compatibility view.
    To achieve this look, right-click on the taskbar and choose the properties dialog. Select the “small icons” checkbox and under the “taskbar buttons” setting, choose “combine when taskbar is full”. It’s not pixel-perfect in accuracy, but it’s close from a functionality point of view.
  17. Peeking at the Desktop. While we’re on the taskbar, it’s worth noting a few subtleties. You’ve probably seen the small rectangle in the bottom right hand corner: this is the feature we call “Aero Peek”, which enables you to see any gadgets or icons you’ve got on your desktop. I wanted to note that there’s a keyboard shortcut that does the same thing – just press Win+Space.
  18. Running with Elevated Rights. Want to quickly launch a taskbar-docked application as an administrator? It’s easy – hold down Ctrl+Shift while you click on the icon, and you’ll immediately launch it with full administrative rights (assuming your account has the necessary permissions, of course!)
  19. One More of the Same, Please. I’ve seen a few folk caught out by this one. If you’ve already got an application open on your desktop (for example, a command prompt window), and you want to open a second instance of the same application, you don’t have to go back to the start menu. You can simply hold down the Shift key while clicking on the taskbar icon, and it will open a new instance of the application rather than switching to the existing application. For a keyboard-free shortcut, you can middle-click with the third mouse button to do the same thing. (This trick assumes that your application supports multiple running instances, naturally.)
  20. Specialized Windows Switching. Another feature that power users will love is the ability to do a kind of “Alt+Tab” switching across windows that belong to just one application. For example, if you’ve got five Outlook message windows open along with ten other windows, you can quickly tab through just the Outlook windows by holding down the Ctrl key while you repeatedly click on the single Outlook icon. This will toggle through each of the five Outlook windows in order, and is way faster than opening Alt+Tab and trying to figure out which of the tiny thumbnail images relates to the specific message you’re trying to find.
  21. Walking Through the Taskbar. Another “secret” Windows shortcut: press Win+T to move the focus to the taskbar. Once you’re there, you can use the arrow keys to select a particular window or group and then hit Enter to launch or activate it. As ever, you can cancel out of this mode by hitting the Esc key. I don’t know for sure, but I presume this shortcut was introduced for those with accessibility needs. However, it’s equally valuable to power users – another good reason for all developers to care about ensuring their code is accessible.
  22. image The Widescreen Tip. Almost every display sold these days is widescreen, whether you’re buying a notebook computer or a monitor. While it might be great for watching DVDs, when you’re trying to get work done it can sometimes feel like you’re a little squeezed for vertical space.As a result, the first thing I do when I set up any new computer is to dock the taskbar to the left hand side of the screen. I can understand why we don’t set this by default – can you imagine the complaints from enterprise IT departments who have to retrain all their staff – but there’s no reason why you as a power user should have to suffer from default settings introduced when the average screen resolution was 800×600.

    In the past, Windows did an indifferent job of supporting “side dockers” like myself. Sure, you could move the taskbar, but it felt like an afterthought – the gradients would be wrong, the Start menu had a few idiosyncrasies, and you’d feel like something of a second-class citizen. The Windows 7 taskbar feels almost as if it was designed with vertical mode as the default – the icons work well on the side of the screen, shortcuts like the Win+T trick mentioned previously automatically switch from left/right arrows to up/down arrows, and so on. The net effect is that you wind up with a much better proportioned working space.

    Try it – in particular, if you’ve got a netbook computer that has a 1024×600 display, you’ll immediately appreciate the extra space for browsing the Internet. For the first day you’ll feel a little out of sync, but then I guarantee you’ll become an enthusiastic convert!

  23. Pin Your Favorite Folders. If you’re always working in the same four or five folders, you can quickly pin them with the Explorer icon on the taskbar. Hold the right-click button down and drag the folder to the taskbar, and it will be automatically pinned in the Explorer Jump List.
  24. Starting Explorer from “My Computer”. If you spend more time manipulating files outside of the documents folders than inside, you might want to change the default starting directory for Windows Explorer so that it opens at the Computer node:
    The Computer node in Windows 7.
    To do this, navigate to Windows Explorer in the Start Menu (it’s in the Accessories folder). Then edit the properties and change the target to read:
    %SystemRoot%\explorer.exe /root,::{20D04FE0-3AEA-1069-A2D8-08002B30309D}

    If you want the change to affect the icon on the taskbar, you’ll need to unpin and repin it to the taskbar so that the new shortcut takes affect. It’s worth noting that Win+E will continue to display the documents library as the default view: I’ve not found a way to change this from the shell at this time.
  25. ClearType Text Tuning and Display Color Calibration. If you want to tune up your display for image or text display, we have the tools included out of the box. It’s amazing what a difference this makes: by slightly darkening the color of the text and adjusting the gamma back a little, my laptop display looks much crisper than it did before. You’d adjust the brightness and contrast settings on that fancy 42” HDTV you’ve just bought: why wouldn’t you do the same for the computer displays that you stare at every day?
    image image
    Check out cttune.exe and dccw.exe respectively, or run the applets from Control Panel.
  26. ISO Burning. Easy to miss if you’re not looking for it: you can double-click on any DVD or CD .ISO image and you’ll see a helpful little applet that will enable you to burn the image to a blank disc. No more grappling for shareware utilities of questionable parentage!
    You can burn an ISO image to disk with this built-in utility in Windows 7.
  27. Windows Movie Maker. Windows 7 doesn’t include a movie editing tool – it’s been moved to the Windows Live Essentials package, along with Photo Gallery, Mail and Messenger. Unfortunately, Windows Live Movie Maker is currently still in an early beta that is missing most of the old feature set (we’re reworking the application), and so you might be feeling a little bereft of options. It goes without saying that we intend to have a better solution by the time we ship Windows 7, but in the meantime the best solution for us early adopters is to use Windows Movie Maker 2.6 (which is essentially the same as the most recent update to the Windows XP version). It’s missing the full set of effects and transitions from the Windows Vista version, and doesn’t support HD editing, but it’s pretty functional for the typical usage scenario of home movie editing.
    Windows Movie Maker 2.6 is compatible with Windows 7.
    Download Windows Movie Maker 2.6 from here:
    http://microsoft.com/downloads/details.aspx?FamilyID=d6ba5972-328e-4df7-8f9d-068fc0f80cfc
  28. Hiding the Windows Live Messenger Icon. Hopefully your first act after Windows 7 setup completed was to download and install the Windows Live Essentials suite of applications (if not, then you’re missing out on a significant part of the Windows experience). If you’re a heavy user of IM, you may love the way that Windows Live Messenger is front and central on the taskbar, where you can easily change status and quickly send an IM to someone:
    Windows Live Messenger appears by default on the taskbar.
    On the other hand, you may prefer to keep Windows Live Messenger in the system tray where it’s been for previous releases. If so, you can fool the application into the old style of behavior. To do this, close Windows Live Messenger, edit the shortcut properties and set the application to run in Windows Vista compatibility mode. Bingo!
  29. Enjoy The Fish. I’m surprised that not many people seem to have caught the subtle joke with the Siamese fighting fish that is part of the default background, so I’ll do my part at keeping the secret hidden. Check out wikipedia for a clue.
  30. When All Else Fails… There are always those times when you’re in a really bad spot – you can’t boot up properly, and what you really want is something you can quickly use to get at a command prompt so you can properly troubleshoot. Windows 7 now includes the ability to create a system repair disc, which is essentially a CD-bootable version of Windows that just includes the command prompt and a suite of system tools. Just type “system repair disc” in the Start Menu search box, and you’ll be led to the utility.

from: msdn blogs

Mac OS evolution

macevo

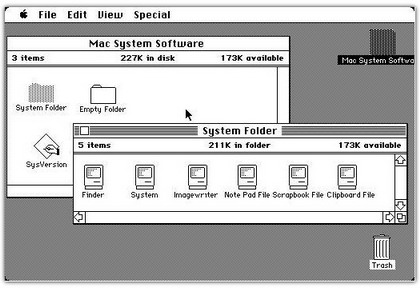
Witness the evolution through time of Macintosh’s operating system, Mac OS. See where it all began, from System 1.0 (1984) to Mac OS X 10.5 (2007).

System 1.0 (January 1984)

s10

main

The first version of the Mac OS is easily distinguished between other operating systems from the same period because it does not use a command line interface; it was one of the first operating systems to use an entirely graphical user interface. Additional to the system kernel is the Finder, an application used for file management, which also displays the Desktop.

These releases could only run one application at a time, though special application shells such as Switcher could work around this to some extent. Systems 1.0, 1.1, and 2.0 used a flat file system with only one kludged level of folders, called Macintosh File System (MFS); its support for folders (subdirectories) was incomplete. System 2.1 (Finder 5.0) introduced the HFS (Hierarchical File System) which had real directories. System 3.0 was introduced with the Mac Plus, adding support for several new technologies including SCSI and AppleTalk, and introducing Trash “bulging”, i.e., when the Trash contained files, it would gain a bulged appearance. System 4.0 came with the Mac SE and Macintosh II.

The System series included the following versions:

  • System 1.0, Finder 1.0 (January 1984)
  • System 1.1, Finder 1.1g (May 1984)
  • System 2.0, Finder 4.1 (April 1985)
  • System 2.1, Finder 5.0 (September 1985)
  • System 3.0, Finder 5.1 (January 1986)
  • System 3.2, Finder 5.3 (June 1986)
  • System 3.3, Finder 5.4 (January 1987)
  • System 3.4, Finder 6.1
  • System 4.0, Finder 5.4 (March 1987)
  • System 4.1, Finder 5.5 (April 1987)

System Software 5 (October 1987)

mac_s5

System Software 5 (also referred to as simply System 5) added MultiFinder, an extension which let the system run several programs at once. The system used a co-operative multitasking model, meaning that time was given to the background applications only when the running application yielded control. A clever change in system functions that applications were already calling to handle events made many existing applications share time automatically. Users could also choose to not use MultiFinder, and thus stick with using a single application at a time as in previous releases of the system software.

System Software 5 was also the first Macintosh operating system to be given a unified “Macintosh System Software” version number, as opposed to the numbers used for the System and Finder files.

The System Software 5 series included the following versions:

  • System Software 5.0 (System 4.2, Finder 6.0, MultiFinder 1.0)
  • System Software 5.1 (System 4.3, Finder 6.0, MultiFinder 1.0)

System Software 6 (September 1988)

system6

System Software 6 (also referred to as simply System 6) was a consolidation release of the Mac OS, producing a complete, stable, and long-lasting operating system.

The System Software 6 series included the following versions:

  • System Software 6.0 (System 4.4, Finder 6.1, MultiFinder 1.1 — the version numbers of the System and MultiFinder files were changed to 6.0 just before the public release)
  • System Software 6.0.1
  • System Software 6.0.2
  • System Software 6.0.3
  • System Software 6.0.4
  • System Software 6.0.5
  • System Software 6.0.6 (only released as an embedded part of the ROM of the Macintosh Classic)
  • System Software 6.0.7
  • System Software 6.0.8 (identical to System 6.0.7, but configured with System 7.0 printing software for printer sharing with System 7)
  • System Software 6.0.8L (only for Macintosh Classic, Classic II, PowerBook 100, Macintosh LC, LC II)

System 7 (May 1991)

system7

On May 13, 1991 System 7 was released. It was the second major upgrade to the Mac OS, adding a significant user interface overhaul, new applications, stability improvements and many new features.

The most significant feature of System 7 was probably virtual memory support, which previously had only been available as a third-party add-on. Accompanying this was a move to 32-bit memory addressing, necessary for the ever-increasing amounts of RAM available. Earlier versions of Mac OS had used the lower 24 bits for addressing, and the upper 8 bits for flags. This had been an effective solution for earlier Macintosh models with very limited amounts of RAM, but it became a liability later. Apple described code that assumed the 24 + 8-bit addressing as being “not 32-bit clean”, and most such applications would crash when 32-bit addressing was enabled by the user.

One notable System 7 feature was the built-in co-operative multitasking. In System Software 6, this function was optional through the MultiFinder. System 7 also introduced aliases, similar to shortcuts that were introduced in later versions of Microsoft Windows. System extensions were enhanced, by being moved to their own subfolder; a subfolder in the System Folder was also created for the control panels. In System 7.5, Apple included the Extensions Manager, a previously third-party program which simplified the process of enabling and disabling extensions.

Systems 7.1 and 7.5 introduced a large number of “high level” additions, considered by some to be less well thought-out than they could have been. Some of the most confusing were the reliance on countless System Enablers to support new hardware, and various System update extensions with inconsistent version numbering schemes. Overall stability and performance also gradually worsened during this period, which introduced PowerPC support and 68K emulation.

Stability returned with Mac OS 7.6, which dropped the “System” moniker as a more-trademarkable name was needed in order to license the OS to the growing market of third-party Macintosh clone manufacturers.

The System 7 series included the following versions:

  • System 7.0 (released in late 1991; integrated MultiFinder always enabled)
  • System 7.0.1 (introduced with LC II and Quadra series)
  • System 7 Tuner (update for both 7.0 and 7.0.1)
  • System 7.1
  • System 7.1 Pro (version 7.1.1, combined with PowerTalk, Speech Manager & Macintalk, Thread Manager)
  • System 7.1.2 (first version for Macs equipped with a PowerPC processor)
  • System 7.1.2 (only for Performa/LC/Quadra 630 series, very quickly replaced by 7.5)
  • System 7.5
  • System 7.5.1 (System 7.5 Update 1.0 — the first Macintosh operating system to call itself “Mac OS”)
  • System 7.5.2 (first version for Power Macs that use PCI expansion cards, usable only on these Power Macs and PowerBooks 5300 and Duo 2300)
  • System 7.5.3 (System 7.5 Update 2.0)
  • System 7.5.3L (only for Mac clones)
  • System 7.5.3 Revision 2
  • System 7.5.3 Revision 2.1 (only for Performa 6400/180 and 6400/120)
  • System 7.5.4, never released
  • System 7.5.5
  • Mac OS 7.6 (name formally changed because of the experimental clone program, although System 7.5.1 and later used the “Mac OS” name on the splash screen)
  • Mac OS 7.6.1

Mac OS 8 (July 1997)

macos8

Mac OS 8 was released on July 26, 1997, shortly after Steve Jobs returned to the company. It was mainly released to keep the Mac OS moving forward during a difficult time for Apple. Initially planned as Mac OS 7.7, it was renumbered “8″ to exploit a legal loophole to accomplish Jobs’ goal of terminating third-party manufacturers’ licenses to System 7 and shutting down the Macintosh clone market.[citation needed] 8.0 added a number of features from the stillborn Copland project, while leaving the underlying operating system unchanged. A multi-threaded Finder was included, enabling better multi-tasking. The GUI was changed in appearance to a new shaded greyscale look called Platinum, and the ability to change the appearance themes (also known as skins) was added with a new control panel. This capability was provided by a new “appearance” API layer within the OS, one of the few significant changes.

Apple sold 1.2 million copies of Mac OS 8 in its first two weeks of availability and 3 million within six months. Mac OS 8.1 saw the introduction of an updated version of the Hierarchical File System called HFS Plus , which fixed many of the limitations of the earlier system (HFS Plus continues to be used in Mac OS X). There were some other interface changes such as separating network features from printing (the venerable, and rather odd Chooser was at last headed for retirement), and some improvements to application switching. However, in underlying technical respects, Mac OS 8 was not very different from System 7.

The Mac OS 8 series included the following versions:

  • Mac OS 8.0
  • Mac OS 8.1 (last version to run on either a 68K or PowerPC processor, added support for USB on the Bondi iMac, added support for HFS+)
  • Mac OS 8.5 (first version to run only on a PowerPC processor, added built-in support for Firewire on the PowerMac G3)
  • Mac OS 8.5.1
  • Mac OS 8.6 (included a new nanokernel for improved performance and Multiprocessing Services 2.0 support, added support for the PowerPC G4 processor)

Mac OS 9 (October 1999)

macos9

macos90-1-1

Mac OS 9 was released on October 23, 1999. It was generally a steady evolution from Mac OS 8. Early development releases of Mac OS 9 were numbered 8.7. MacOS 9 added improved support for AirPort wireless networking. It introduced an early implementation of multi-user support (though not considered a true multi-user operating system by modern standards). An improved find-sherlock engine with several new search plug-ins. Mac OS 9 also provided a much improved memory implementation and management. AppleScript was improved to allow TCP/IP and networking control. Mac OS 9 also made the first use of the centralized Apple Software Update to find and install OS and hardware updates. Some other resplendent and unique features included its on-the-fly file encryption software with code signing and Keychain technologies, Remote Networking and File Server packages and much improved list of USB drivers.

OS 9 also added some transitional technologies to help application developers adopt some OS X features before the introduction of the new OS to the public, again easing the transition. These included new APIs for the file system, and the bundling of the Carbon library that apps could link against instead of the traditional API libraries — apps that were adapted to do this can be run natively on OS X as well. Other changes were made in OS 9 to allow it to be booted in the “classic environment” within OS X. This is a compatibility layer in OS X (in fact an OS X application, known in developer circles as “the blue box”) that runs a complete Mac OS 9 operating system, so allowing applications that have not been ported to Carbon to run on Mac OS X. This is reasonably seamless, though “classic” applications retain their original OS 8/9 appearance and do not gain the OS X “Aqua” appearance.

The Mac OS 9 series included the following versions:

  • Mac OS 9.0
  • Mac OS 9.0.2
  • Mac OS 9.0.3
  • Mac OS 9.0.4
  • Mac OS 9.1
  • Mac OS 9.2
  • Mac OS 9.2.1
  • Mac OS 9.2.2

Mac OS X (March 2001)

mac-os-x

tiger_01

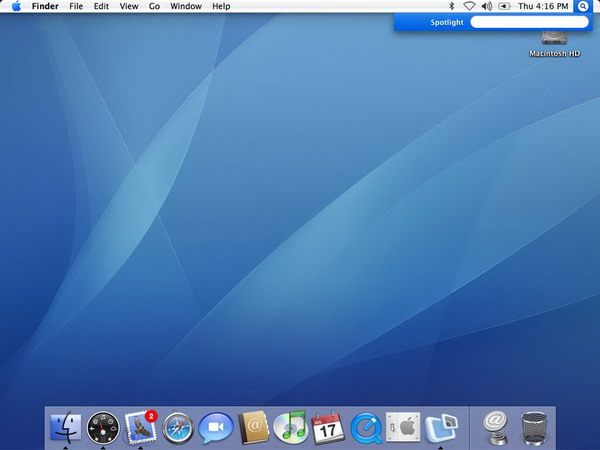
Mac OS X is the newest of Apple Computer’s Mac OS line of operating systems. Although it is officially designated as simply “version 10″ of the Mac OS, it has a history largely independent of the earlier Mac OS releases.

The Mac OS X series include the following versions:

  • Mac OS X Public Beta “Kodiak”
  • Mac OS X v10.0 “Cheetah”
  • Mac OS X v10.1 “Puma”
  • Mac OS X v10.2 “Jaguar”
  • Mac OS X v10.3 “Panther”
  • Mac OS X v10.4 “Tiger”
  • Mac OS X v10.5 “Leopard”
  • Mac OS X v 10.6 “Snow leopard”

snowlepord

My XPS m1210 and Windows 7 64bit

I had been running windows xp with ubuntu and mac os on my xps since last 2 years. The latest reinstall of xp was some time in February 2009. I have a habbit of installing so many applications and as it goes on and on there comes a time that my start menu is so full that I just cant see the new programs that I installed. Then I have to delete some start menu items. I do not like vista because it is a resource hog. Lately I had heard too much about windows 7 being so low on resources and all that so I tried to give It  a shot.

Downloaded 64 bit copy of it form Microsoft. Burned it on a DVD and installed it. The only problem with 64 bit OSes is that you don’t get the correct drivers. Same was the problem with me. I installed it. Everything except the camera, card reader and my graphics card worked out of the box.

I started my search for the drivers and found them here at this post by Ubikann.

The Card reader drivers are available at this site.

The Logitech diver can be downloaded from dell support via this link.

For an antivirus/firewall solution the latest ESET Smart security 4 works just fine on the 64 bit Windows 7 operating system.

I liked windows 7 very much. Its drag and drop is much more intuitive like the mac os 10.5

The interface is so sleek and the dashboard or what ever they call is super cool. The preview is too good. Previously I didn’t like an extra click to move to the window I wanted but now I am a fan of it.

I use my machine for web design and some gaming and so far windows 7 has supported all my applications except for the I8kfangui and Rightmark CPU clock utility because of unsigned drivers.

I tried running in test mode but that too didn’t help.

I have more than 20 windows open at once and all rums smoothly. Vista sucked at this.

Clipboard01

You should also know:
– When the final version of Windows 7 comes out you will not be able to upgrade to it so you will have to do a clean installation
– You can upgrade from Vista 32 bit to Windows 7 32 bit but you cannot upgrade from Vista 32 bit to Windows 64 bit. You cannot upgrade from any version of Windows XP to Windows 7 you’ll need to do a clean install. I would recommend a clean installation though ONLY after having backed up all your data as you will erase everything on your hard disk and I would recommend backing up your data even if you upgrade as you never know what can happen.
– The Windows 7 RC will stop working on June 1, 2010

Mac OS X 10.5.6 on my XPS 1210

I have been fascinated by the Apple’s Mac OS ever since I got to know about it. And when I came to know that I could install it on my laptop, I was delighted. I have been successfull in installing various versions from days of OS X 10.4 [Tiger]. Lately I thought of installing 10.5.6 and upgrading it to 10.5.7 on the same old XPS m1210 which I bought in November 2006.

My XPS Mac

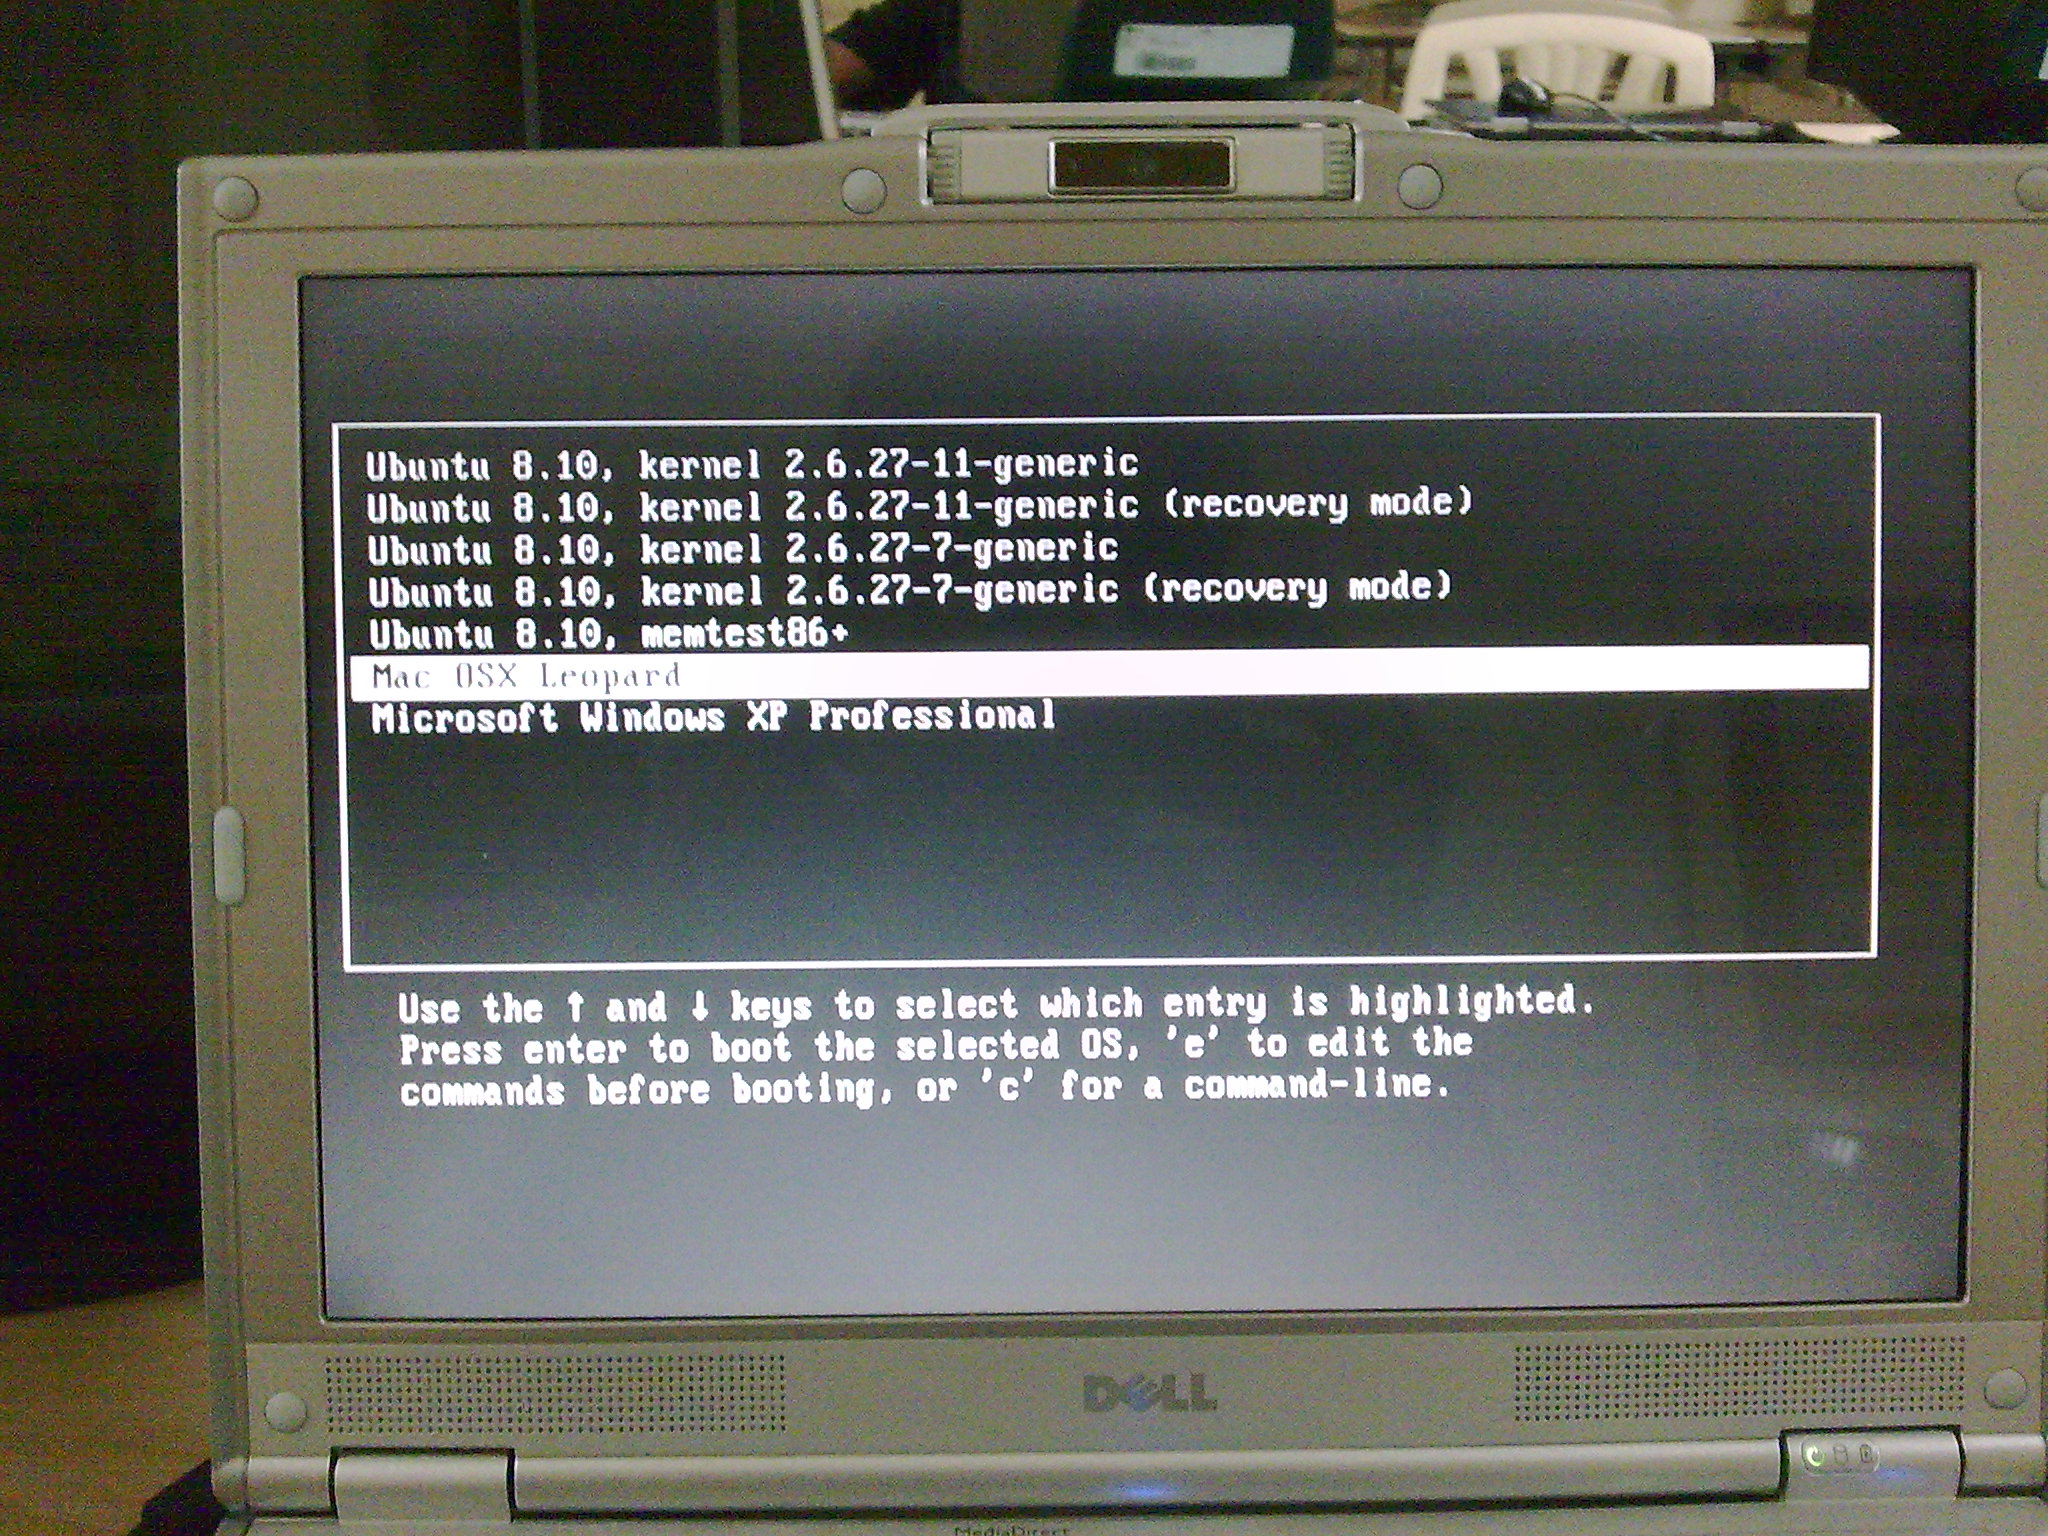
Mac OsX 10.5.6 on my XPS m1210 with triple boot.

My previous posts.

Leopard 10.5.1 [Kalyway] on my XPS1210

My Dell o MAC

Mac OSX + XP dual boot

Mac vs. PC: What you don’t get for $699

I‘m a sucker for a well-made TV ad.

Inspired by the Nike “Just Do It” and “Air Jordan” campaigns of decades past, I mentally mapped out storyboards of the spots I wanted to produce. Nowadays I laugh at clever beer and soda commercials and get mad or pump my fist in the air along with political ads.

I cheered for Apple’s 1997 “Think Different” spot that featured actor Richard Dreyfuss reading the “Here’s to the Crazy Ones” speech. The commercial resonated in a house full of Mac users at a time when Macs were widely considered an endangered species.

Apple’s more recent “Mac vs. PC” ads lampooning Microsoft strike a different chord: Macs are friendly, cool, easy to use, and they don’t have the kinds of problems usually associated with Microsoft’s Windows operating system; PC, portrayed by the hilarious John Hodgman, comes across as ridiculous – not unlike the real-world, buggy Windows Vista.

Now Microsoft is fighting back with its own advertising campaign. I’ve enjoyed some of its elements. The Seinfeld spots were weird. I was intrigued by some of the “I’m a PC” spots that aired last fall, depicting PC users engaged in a variety of jobs – teaching law, protecting endangered species, blogging for Barack Obama.

The message: You can use a Windows PC and still do cool and interesting things. Not bad. Then came the adorable little girls: Kylie, age 4, and Alexa, age 7, e-mailing pictures of fish and stitching together pictures of a fort into one. Microsoft, it seemed, had finally found its advertising voice.

Then came Lauren, the perky, red-haired twentysomething meant to represent an average American shopping for a computer. She wants a notebook with a 17-in. screen, and if she finds it for less than $1,000, she can keep it. Following her as she shops, we learn she considers the Mac too expensive – that she’s not “cool enough to be a Mac person,” she whines.

From the Apple store, it’s off to Best Buy, where she finds a PC that meets her specifications for $699. Mission accomplished, she jumps up and down clapping as though she won on The Price Is Right, ending the spot by saying “I’m a PC, and I got just what I wanted.” Aaaand Cut!

The price weapon
Microsoft used earlier ads to defend itself suitably against Apple’s nerdiness allegations. Now Microsoft is on the advertising offensive, wielding price as a weapon of choice. It’s an effective approach during a recession. But as is always the case with advertising, the full story is more nuanced.

Yes, $699 beats the $2,800 you’d pay for a Mac with a 17-in. screen. But when it comes to PCs, there’s still a great deal more to buy.

First, there’s security software. The PC in question comes with a 60-day trial Norton Internet Security 2009 from Symantec. After the trial runs out you’ll pay Symantec $50 a year to protect your PC (and up to two others in your home) from all the nasty viruses, worms, and other malware lurking on the Internet. That’s $150 over the three years Lauren is likely to hold on to her PC. No need for antivirus on the Mac.

Next, let’s say something goes wrong on the computer once the warranty expires and that it requires the intervention of a third party. Geek Squad will charge you $129 just for a diagnosis. A diagnosis from the Genius Bar in Apple’s retail stores? Free.

Then there’s iLife, the suite of multimedia tools that comes standard on the Mac. With iLife you can organise photos and home movies and turn them into watchable DVDs. Garageband helps you create your own music and another iLife element aids in Web site creation.

Extras cost extra
It’s hard to replicate that bundle if you’re a Windows user. The Hewlett-Packard machine in Lauren’s case does ship with discs for Muvee Reveal, a video-editing program that usually costs $80, and CyberLink DVD Suite, which runs $104.

But if she wants Adobe’s Photoshop Elements, including a membership in Photoshop.com Plus, she’ll need to shell out about $140. Sonic Solutions’ Roxio Creator 2009, which combines video-editing and DVD-creating tools, will cost another $100. And the closest equivalent to Garageband on Windows is Cubase Sequel and it goes for another $100.

Add it all up and it’s not hard to imagine Lauren’s $699 computer costing something closer to $1,500.

But that doesn’t include harder-to-quantify shortcomings. The HP’s battery lasts only 2.5 hours on a charge, compared with eight hours for the 17-in. MacBook Pro, which also happens to be 1.2 lb. lighter and boasts substantially better screen resolution: 1,920 pixels wide by 1,440 high, vs. 1,440 by 900 for the HP.

Even if Lauren doesn’t care about pixels and multimedia software, her machine still doesn’t measure up when it comes to overall consumer satisfaction. No less an authority than Consumer Reports rated Lauren’s computer fourth in a class of six with 17- to 18-in. displays. The MacBook Pro was tops, despite its higher price.

PC makers should focus more on quality
Usually silent on such things, Apple did give me a comment on the Microsoft ads. “A PC is no bargain when it doesn’t do what you want,” Apple spokesman Bill Evans says. “The one thing that both Apple and Microsoft can agree on is that everyone thinks the Mac is cool. With its great designs and advanced software, nothing matches it at any price.” Microsoft declined to comment.

Microsoft and its hardware partners wouldn’t have to make this case had they focused less in the past decade on driving prices down and more on quality. Forrester Research recently released results of a study of consumer experiences with computer companies, assessing their view of a machine’s usefulness, usability, and enjoyability. Apple ran the table in all three categories, well ahead of Gateway (now a unit of Acer), HP, and Dell.

PC makers in the Windows camp have done everything possible to make their products progressively worse by cutting corners to save pennies per unit and boost sales volume. There’s good reason Apple is seeing healthy profits while grabbing market share.

It refuses to budge on quality and so charges a higher price. Rather than running ads that seem clever at first but really aren’t, the Windows guys ought to take the hint and just build better computers.

Gmail Can Now Tell Which Of Your Contacts Are Awake

Gmail Labs continues to make an awesome product even better. Tonight the site has introduced ‘Sender time zone’, a feature that allows users to quickly tell if their contact is likely awake or sound asleep, based on the time zone their Emails are being sent from. The feature takes advantage of the time zone data often included in Email headers, showing a green light for contacts that are probably awake and a red one for those that are asleep. For those of us who live and die by our inboxes, it can be tough to keep track of the contacts that are abroad, which can lead to some awkward phone calls (I’ve accidentally called CEOs of startups located in the UK at around 4 in the morning, their time). The feature is also helpful for determining how quickly you can expect an Emailed response from your contact (again, I’ve sent urgent messages to PR representatives who were based abroad). As with all Google Labs features (other notables include a Panic Button and Multi-Pane Viewing) users can access the feature by enabling Google Labs through their Gmail settings, then selecting ‘Sender Time Zone’.

Why my 320 GB HDD is only 298 GB

Did you ever wonder that you had bought a 120 GB HDD but the computer showed it as a 111 GB HDD. And where did the rest of the space eventually disappear? Well nothing disappeared and even the manufacturer didnt make a fool of you.

This happens because there is a slight difference between the way the computer and the manufacturer calculate the HDD size.

One GB according to Computer Science Terminology

8bit = 1 Byte

1024 Bytes = 1 Kbyte

1024 KBytes=1MByte

1024 Mbytes=1GByte

One GB according to Manufacturers

8bit = 1 Byte

1000 Bytes = 1 Kbyte

1000 KBytes=1MByte

1000 Mbytes=1GByte

A we see that greater the hard drive size the larger is the number of missing GBs…

Theoretical Value Practically what we get
1 GB 0.931 GB
10 GB9.31 GB
20 GB18.62 GB
40 GB37.25 GB
80 GB74.50 GB
120 GB111.75 GB
160 GB149.01 GB
250 GB232.83 GB
320 GB298.02 GB
500 GB465.66 GB

The manufacturers state that they call one GB as 109 and not 1024x1024x1024

Leopard, Ubuntu and Windows XP multiboot

I have been a fan of the Mac OS ever since i cam to know about it. When i got my first computer I tried my best to make the windows look like mac but it was not upto my expectations and buys a mac was not an option for me. Then came the OSX86 project and it made my dream come true. I started experimenting with OSX 10.4.8 and kept trying to get it working on my Minimachine [xps 1210]. It took me around 6 months and several GBs of downloads to get tit to work.

I joined college for MBA and the Mac os in its latest flavour named the leopard was with me till i had to let go of it to install Linux because I had never thought that I would be installing 3 OSs simultameously and it went on like that for 6 more months and i was without mac os. Today I reinstalled macosx 10.5.2 and it jsut didnt boot as I had Ubuntu too installed previously and i got the Grub error…

Then I did the following to fix grub and added an entry into grub for booting macosx…

How to fix grub….

1. Boot the Desktop/Live CD. (Use Ubuntu 8.04 or later)

2. Open a terminal (Applications -> Accessories -> Terminal)

3. Start grub as root with the following command :

     sudo grub

4. You will get a grub prompt (see below) which we will use to find the root partition and install grub to the MBR (hd0)

         [ Minimal BASH-like line editing is supported.   For
         the   first   word,  TAB  lists  possible  command
         completions.  Anywhere else TAB lists the possible
         completions of a device/filename. ]

grub>

Type the following and press enter:

find /boot/grub/stage1

If you get "Error 15: File not found", try the following:

find /grub/stage1

Using this information, set the root device (fill in X,Y with whatever the find command returned):

grub> root (hd0,3) // for me it was (hd0,3)

Install Grub:

grub> setup (hd0)

Exit Grub:

grub> quit

Boot into Ubuntu

Open Terminal and run this command.

" sudo gedit /boot/grub/menu.lst "
it will allow to configure your boot order.

3) Edit your OSX in Editor Window.

title OSX86

root (hd0,0) " Replace with your Partition of OSX "

chainloader +1

Now Grub lets me choose which os to boot….

Ubuntu

Leopard

Windows XP

Grub on minimachine
Grub on minimachine

when i chose leopard I am presented with the Darwinx86 booot loader which presents to me all partitions to boot from an if i choose Linux from Darwin then i again get back to Grub…. 🙂

Darwin boot loader on minimachine

I just can keep switching between boot loaders and boot any os that I want….

The existing issues of single core only and no camera and card reader and no shut down still bug me… The shutdown and sleep had worked for me at times but not always.

Ten Things To Know About Windows 7

Here are the top 10 things to know about Windows 7:


1 – Application compatibility

The Windows Vista operating system introduced architectural changes down to the kernel level that made the OS inherently more secure than Windows XP. However, this came at a cost; many applications needed modification to function properly in a Windows Vista environment. While at this point in the lifecycle of Windows Vista (post Service Pack 1) most applications are now compatible, deploying Windows Vista into the desktop environment early on required some “heavy lifting” and creative shimming—not to mention a few late nights.


Windows 7 is built on the same basic architecture as Windows Vista, so most applications will retain their compatibility between these operating systems. This alone will make adopting Windows 7 much less challenging than migrating from Windows XP to Windows Vista. If your organization is like many that are still standardized on Windows XP, you will need to transition to updated versions of your key applications, but the availability of Windows Vista–compatible versions and well-proven shims will make this task more manageable.


2 – Hardware compatibility and requirements

Much like the application compatibility issues, adopting Windows Vista early-on was a challenge because of the higher system requirements—such as RAM and graphics.  On the flip side, Windows Vista provides manageability and security that just isn’t available on Windows XP, and with more capable hardware, Windows Vista is able to perform a number of useful functions that improve productivity (such as Windows Search 4 and the Windows Aero desktop experience) and increase PC responsiveness (the ReadyBoost technology launches applications more quickly by maintaining a portion of frequently used applications in memory).


Windows 7 was designed to perform well on the same hardware that runs Windows Vista well, while delivering additional performance and reliability improvements. The design team for Windows 7 had a specific focus on the fundamentals—as well as maintaining compatibility with existing applications and hardware. In operation, you will find that Windows 7 boots faster and has a smaller memory footprint than Windows Vista.


3 – Better Together with Windows Server 2008

One of the key benefits of the modern operating system is that Windows 7 and the Windows Server 2008 operating system share a common code base, and are maintained with a single servicing model. This servicing model means updates and security updates are shared across both client PCs and servers, simplifying the process of maintaining an up-to-date infrastructure.


In addition, environments with both Windows Server 2008 and Windows 7 unlock capabilities that extend functionality and help ensure a more secure environment. One example is DirectAccess, which allows management and updating of remote mobile PCs that are connected to the Internet, even when they are not connected to the corporate network. This capability helps ensure that remote users receive security patches on a timely basis, and allows IT to update configuration setting via Group Policy. For the end user, DirectAccess allows access to locations on the corporate network without using a virtual private network (VPN) connection. (In addition to Windows Server 2008 R2, DirectAccess requires IPSec and IPv6 implementation.)


4 – Extend data encryption to removable media

News reports are rife with stories about companies losing control over sensitive information. In some industries, this is an issue with grave legal implications, while in other situations the issue is inconvenience. Regardless, smart compliance policy dictates that sensitive information be safeguarded in the event of a lost or stolen laptop. Further, preventing sensitive information from being removed from corporate resources is a pillar of effective compliance management.


Windows 7 includes BitLocker technology, first implemented in Windows Vista, which now provides full encryption of all boot volumes on a PC; along with introducing BitLocker To Go that offers data protection on portable storage, such as USB flash drives. In addition, BitLocker Drive Encryption and BitLocker To Go can be managed via Group Policy, placing more control over sensitive information in the hands of the professionals.


5 – Control the application portfolio available to end users

Windows 7 features AppLocker, a new capability that allows IT administrators to specify which applications are permitted to run on a laptop or desktop PC. This capability helps you manage license compliance and control access to sensitive programs, but also importantly, it helps reduce the opportunity for malware to run on client PCs. AppLocker provides a powerful rule-based structure for specifying which applications can run, and includes “publisher rules” that keeps the rules intact though version updates.


To see how AppLocker is set up and managed, click here for a screencast demonstration.


6 – Automate routine tasks with powerful scripting

To help IT administrators better maintain a consistent environment and improve personal productivity, Windows 7 includes an updated graphical scripting editor, Windows PowerShell 2.0—a powerful, complete scripting language that supports branching, looping, functions, debugging, exception handling, and internationalization.


  • PowerShell 2.0 has an intuitive, graphical user interface that helps make script generation easier, especially for administrators who are not comfortable in command-line environments.
  • PowerShell 2.0 supports two types of remoting—fan-out, which delivers management scripts on a one-to-many basis, and one-to-one interactive remoting to support troubleshooting of a specific machine. You can also use the PowerShell Restricted Shell to limit commands and command parameters to system administrators, and to restrict scripts to those who have been granted rights.
  • PowerShell 2.0, with the Group Policy Management Console (available as a separate download), allows IT professionals to use scripting to manage Group Policy Objects and to create or edit registry-based group policy settings in Windows 7. Similarly, you can use PowerShell to configure PCs more efficiently, using richer logon, logoff, startup, and shutdown scripts that are executed through Group Policy.


Click here to take a quick tour of PowerShell 2.0.


7 – Troubleshoot faster and more effectively

Windows 7 provides rich tools to identify and resolve technical issues, often by the end users themselves. If a help desk call is unavoidable, Windows 7 includes several features and troubleshooting tools to help speed resolution.


  • The Problem Steps Recorder allows end users to reproduce and record their experience with an application failure, with each step recorded as a screen shot along with accompanying logs and software configuration data. A compressed file is then created that can be forwarded to support staff to help troubleshoot the problem.
  • Windows 7 includes a suite of troubleshooting packs, collections of PowerShell scripts, and related information that can be executed remotely by IT professionals from the command line, and controlled on the enterprise basis through Group Policy Settings.
  • Windows 7 also includes Unified Tracing to help identify and resolve network connectivity issues in a single tool. Unified Tracing collects event logs and captures packets across all layers of the networking stack, providing an integrated view into what’s happening in the Windows 7 networking stack and aiding analysis and problem resolution.


8 – Create, deploy, and manage images more efficiently

Windows 7 includes several tools to streamline the creation and servicing of the deployment image, and to get users up and running as quickly as possible.


The Deployment Image Servicing and Management (DISM) tool in Windows 7 provides a central place to build and service Windows images offline. With DISM, you can perform many functions with one tool: mount and unmount system images; add, remove, and enumerate packages and drivers; enable or disable Windows features; configure international settings, and maintain an inventory of offline images that contain drivers, packages features, and software updates. Windows 7 also enables the same processes and tools to be used when managing virtual machine (VHD) and native file-based (WIM) image files.


Windows 7 also includes Dynamic Driver Provisioning, where device drivers are stored independent of the deployed image and can be injected dynamically based on the Plug and Play ID of the hardware, or as predetermined sets based on information contained in the basic input/output system (BIOS). Reducing the number of drivers on individual machines reduces the number of potential conflicts, ultimately minimizing setup time and improving the reliability of the PC.

When you are ready to deploy Windows 7, Multicast Multiple Stream Transfer enables servers to “broadcast” image data to multiple clients simultaneously, and to group clients with similar bandwidth capabilities into network streams to permit the fastest possible overall transfer rate while optimizing bandwidth utilization.


Watch a screen cast demonstration of the deployment tools for Windows 7 here.


9 – Easier migration of user data and profiles

Windows 7 includes enhancements to the User State Migration Tool (USMT), a command-line tool that you use to migrate operating system settings, files, and other user profile data from one PC to another. In Windows 7, USMT adds a hardlink migration feature for computer refresh scenarios, a capability that stores user data and settings in a common place on a drive, eliminating the need to “physically” move the files during a clean install.


10 – Improve user productivity in branch offices

Windows 7 introduces BranchCache, a technology that caches frequently accessed content from remote file and Web servers in the branch location, so users can access this information more quickly. The cache can be hosted centrally on a server in the branch location, or can be distributed across user PCs. One caveat: to take advantage of BranchCache, you will need to deploy Windows Server 2008 R2 on the related servers.


And, as a bonus:


Better support for client virtualization

Windows 7 delivers a richer experience when users are connected to a virtual desktop—much closer to the experience provides by a native Windows desktop. For example, Windows 7 provides multi-monitor support, bi-directional audio to enable Voice over Internet Protocol (VoIP) and speech recognition applications, and access to local devices, such as printers.